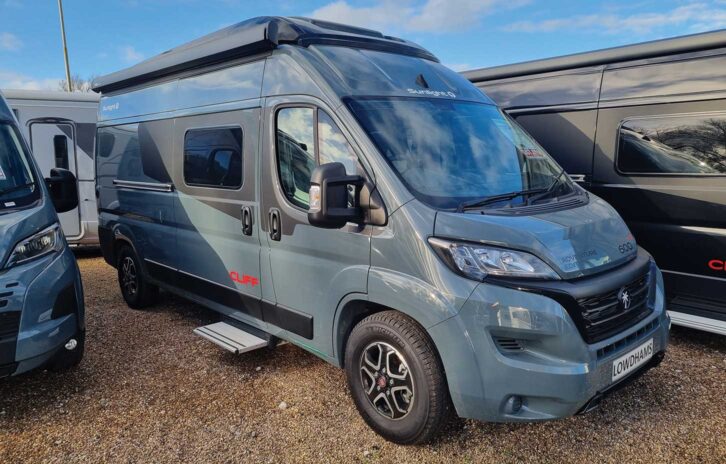
Campervan and motorhome tyres are often a rather reluctant purchase. They generally only get replaced when they’re worn out or have got too old to use. You reluctantly spend hundreds of pounds on their replacements and you get another set of black donuts that look almost exactly the same. It’s not the most exciting purchase, which is why so many people simply trust their local garage to fit the cheapest tyres they can source.
However, this casual decision could actually prove to be one of the most costly motorhome mistakes that you could ever make. After all, the tyres are the only thing that connects your 3.5-tonne motorhome to the road and they lead an incredibly tough life, being subject to all weather conditions, heat, high shearing and static loads as well as all manner of shock loads.
The technology to cope with all these loading challenges has evolved dramatically over the years, and the top premium tyres are a marvel of engineering, using special compounds, reinforcement and computer-designed tread patterns. There’s a lot of tech that goes into constructing these seemingly simple rings of rubber.
Here, I’m going to talk you through everything you need to consider.
Something else you could be interested in is upgrading to motorhome alloy wheels – see what I have to say about them before you bolt on a set.
Motorhome tyres: what you need to know
What are motorhome tyres made of?
Premium vs budget tyres
How often should motorhome tyres be changed?
Tyre sidewall markings
Are motorhome tyres different to van tyres? AKA: Van or Camping tyres?
EV tyres
Tyre care
So what are motorhome tyres actually made of?
You might be surprised that, although rubber is a critical component (70% of the world’s natural rubber is used in tyre production), it’s not actually the main ingredient. Most vehicle tyres use only about 15 to 30% of natural rubber per tyre. Natural rubber is actually brown in colour, but it’s the addition of carbon black (a black carbon powder produced by burning coal tar, oil or gas at high temperature) that gives them their colour. Carbon black is also common in both printer toner and mascara.
The bulk of a tyre is made from synthetic rubber, chemically produced in a lab and combined with a mixture of fibres for the reinforcement cords (rayon, nylon, polyester and aramid fibres are used), together with high-strength steel wire for the cords and steel belting. Various other fillers, plasticisers, vulcanisation chemicals and anti-ageing chemicals complete the picture.
Around 200 raw materials go into making up the 25 separate components, and up to 12 different natural and synthetic rubber compounds will go into making a tyre. The precise properties of each tyre are a closely guarded secret for each tyre brand, with every tyre being made to a precise recipe of ingredients depending on its intended usage.
Premium vs budget tyres
The key thing to be aware of when buying motorhome tyres is the hierarchy of premium versus budget tyres. Most tyre companies have a premium brand (like Continental) and sub-brand (Uniroyal, a division of Continental).
The top tier brands are Michelin, Bridgestone, Continental, Goodyear, Pirelli, Dunlop and Yokohama.
There is a glut of exceptionally cheap tyres that are flooding the market from overseas suppliers in low-labour-cost countries such as China, India, Thailand, Vietnam and Mexico.
While some of these are reasonable quality, many are not and tyres are one of the few products where brand really matters. Budget tyre brands can perform poorly when compared with a premium tyre in wet braking tests. We’d suggest avoiding these brands if you can.

Sandwiched between premium and budget tyres are the mid-range tyres. While some of these can be reasonable quality, they rarely outperform a premium model in tyre tests.
But why does this matter on a gently driven motorhome? It all boils down to the tyres’ grip on the road. You might be the best driver in the world, but if a budget tyre has a ‘float’ speed that’s 10mph lower than that of a premium tyre on standing water, you’re more likely to experience aquaplaning.
In a 2025 test by the highly respected German ADAC organisation (the equivalent of the AA or RAC) they found that in an 80kph to 0kph wet braking test, the top performing tyre stopped at 28.7 metres. The worst budget tyre stopped at 45.1m. That’s 16.4m difference or three VW Transporters, or two Frankia A-Class models. A sobering thought.
How often should motorhome tyres be changed?
Many motorhomes only ever do low mileages, so it can feel like an unnecessary expense to replace them if they’re not worn down to the legal minimum. The minimum legal tread depth is 1.6mm across three quarters of the tread width for most van-based sizes of motorhomes (such as VW Transporter-type medium-size ’vans and Ducato-based large ’vans).
For coach-based A-class motorhomes (such as Morelo) and RVs the minimum tread depth is 1mm. It’s the same for trucks, buses and coaches, too (which is odd given the amount of people the latter two vehicles can carry).
You can be fined up to £2500 per tyre, as well as points on your licence for having an illegal tyre tread depth, so it’s definitely not something that’s worth risking.
While 1.6mm might be the minimum, once the tread gets below 3mm, the tyres’ wet-weather performance will be severely compromised and the risk of aquaplaning is far higher. So we’d replace tyres when they dip below 3mm tread depth. See our tips for driving a motorhome in heavy rain for advice on using your vehicle in wet conditions.
All tyres have tread wear indicators (TWIs) built into the tread grooves.

These blocks of rubber are set at the minimum legal tread depth, and when the surrounding tread is level with these blocks the tyre must be replaced. But we’d still advise that it’s safer to replace them at 3mm. While some online advice centres recommend using as 20p coin to measure tread depth (the outer bezel is around 3mm wide), it’s better to use a tyre tread gauge – they cost under £5 online.
If your tyre tread depth is fine – and because many motorhomes often do low annual mileages, this is often the case – you then need to consider the tyre age and when to replace it. Over time tyres suffer from UV damage, heat damage from rotation and a great many shock loads from bumps and pot-holes. They get a battering over their lifetime and, as they have to contend with sun, rain, snow, frost and ice in the UK, they really do live a tough life.
The Camping and Caravanning Club reckons that you should replace tyres after seven years from the date of manufacture on the sidewall, while the Caravan and Motorhome Club suggests five years. I think that this is good advice, but it also depends on the individual tyre condition. Signs of cracking or splits in the sidewall indicates a replacement is due. But if the tyres are five years old, you need to start thinking about replacing them and having them thoroughly checked.
Don’t miss what I have to say about tyre maintenance when winterising a motorhome, either.
Tyre sidewall markings
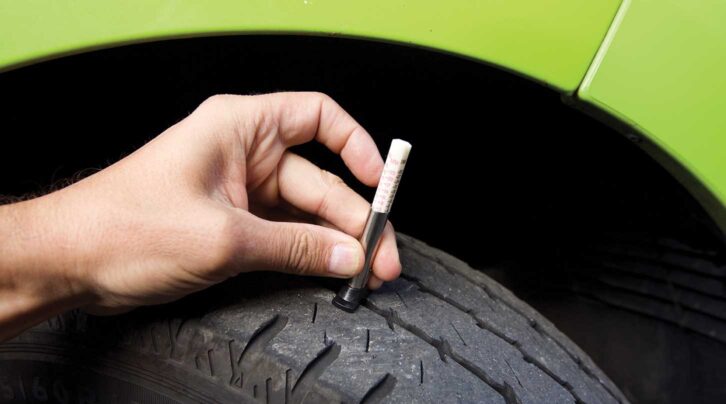
So where will you find the manufacture date on your tyres? If you look on the sidewall of all your tyres you’ll see an oval box with four numbers stamped in it. For example, it might say 0322. This means the tyre was made in week 3 of 2022. If there is no date code marked on the tyre, or it is in a three-digit format, the tyre was made before 2000 and needs urgent replacement. Don’t forget to check your spare tyre, too.
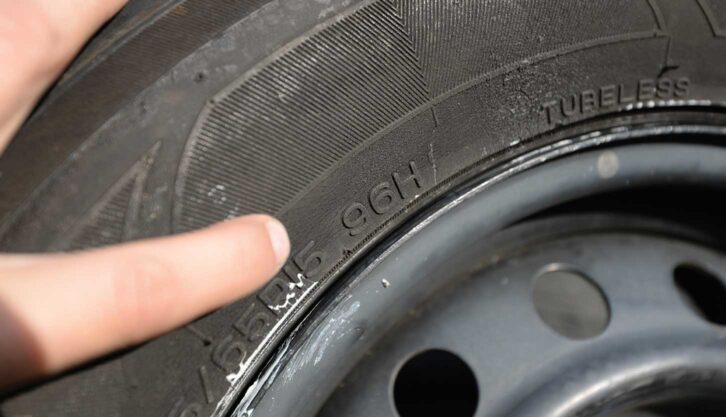
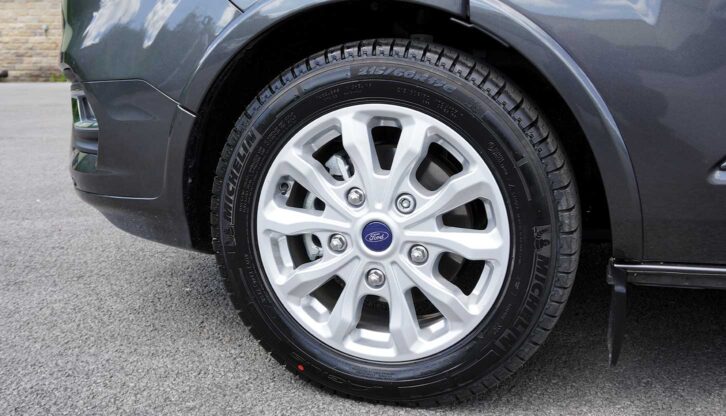
The tyre size will also be marked on the sidewall – for example, as 215/60R-17C, which is a common size for many medium vans such as Ford Transit Customs and Vauxhall Vivaros. The ‘215’ is the tyre’s width in millimetres, while the ‘60’ is called the aspect ratio and means that the sidewall height is 60% of the tyre’s width (for example, 60% of 215mm is 129mm). The smaller the aspect ratio number, the lower the profile of the tyre.
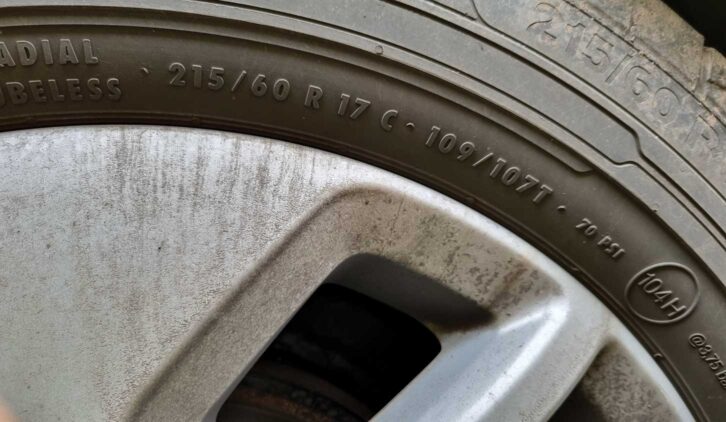
The ‘R’ is a bit of an old-fashioned designation and relates to the tyre construction being of a radial design (earlier tyres used a cross-ply construction, which is still used on certain race tyres). The ‘17’ relates to the tyre diameter measured at the point at which the tyre touches the wheel rim bead, and curiously, is stated in inches – a wonderful imperial and metric mismatch!
The other markings on the tyre that matter are the speed and loading ratings. This is detailed by one or two three-digit numbers next to a letter (‘109/107T’, for instance). The two numbers relate to how the tyre is used – the 109 rating is for a single tyre, while the lower 107 rating is when it is used on a dual back wheel set-up (like four tyres on one axle). 109 equates to maximum load of 1030kg, while 107 relates to 975kg.
The letter ‘T’ relates to the maximum rated speed of the tyre – 118mph or 190kph, in this case.
You must stick to the load and speed rating of your existing tyres (or go higher) when replacing tyres.
Are motorhome tyres different to van tyres? AKA: Van or Camping tyres?
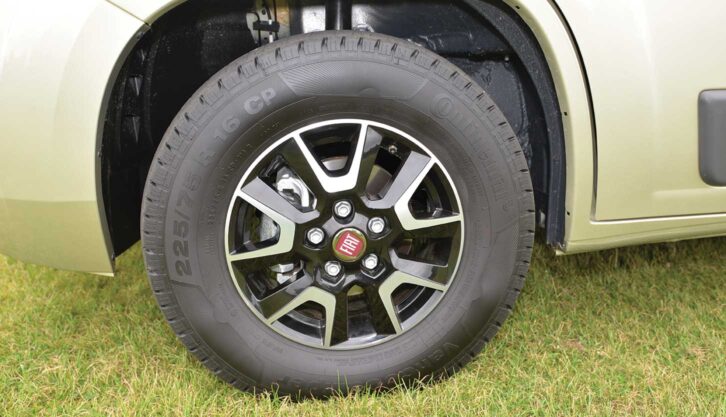
In our example, the ‘C’ on the sidewall means that the tyre is a commercial (or van) tyre designed to withstand heavier loads thanks to a more heavy-duty construction with extra plies in the tyre. If you’re an owner of the best campervan, your tyres should be C marked as a minimum. No C mark could mean that they’re car tyres and need replacing.
The best tyres for motorhomes are marked ‘CP’ for camping, and are specifically engineered to suit motorhomes. This includes an extra-stiff construction, different compounds and a tread pattern that is optimised for road and slippery grass pitches.
They are often marked ‘M+S’ for mud and snow ratings, too. The ultimate snow-rated tyres are marked with a three-peak mountain symbol (though these are not as capable in snow as a dedicated winter tyre, which could be useful if you’re motorhoming during the winter months).
The current trend for fitting off-road tyres to motorhomes with ‘swamper’ style overlander alloys for a tougher, more rugged look does also come at the expense of on-road grip. Off-road tyres have larger gaps between the tread blocks that work great in muddy conditions, but can often perform badly on the road in wet conditions. I have off-road tyres on my daily 4×4 and they’re not good in the rain and can even aquaplane at low speeds. Think carefully before buying all-terrain or off-road tyres if you primarily drive on metalled roads.
EV tyres
A recent introduction to the tyre market are dedicated EV tyres. While there are not that many electric campervans currently on sale, the numbers are growing and tyre makers are starting to produce dedicated EV tyres. The extra weight of batteries in EVs means that they need extra-stiff sidewalls to cope with the additional weight.
Because EVs all use electric motors in their drivetrains that produce massive amounts of torque (the twisting force that acts on the wheels) from zero revs, the tyre tread and compounds have to be optimised to cope with these extra forces. Many makers now insist on tyres that are specifically designed for their particular brand of EV.

but be aware that many may need expensive EV-specific tyres
The other difference with an EV tyre is the road noise. Because EVs are far quieter than diesel engines, tyre roar is far more noticeable in the cabin. To dampen out this unwanted noise, EV tyres often feature a sound-deadening pad mounted inside the tyre around the circumference.
All theses extra features inevitably elevate the price of EV tyres.
Tyre care
A tyre will tell you if it’s unhappy by its wear pattern. Underinflated tyres will wear out at both edges of the tread, while overinflated tyres will show excess wear in the centre of the tread.
Any wear at one edge of the tread, or uneven tread wear, indicates a problem with wheel alignment, worn suspension bushes or struts, or possibly crash damage. Hitting a pothole too hard, or bumping into a kerb can also cause issues. It’s well worth having the wheel alignment checked during the annual service and definitely every time you fit new tyres.
On most ’vans there is not a great deal of suspension adjustment, but the amount of toe-in and toe-out is adjusted by winding the steering rack arms in (or out) to a precise level. You can’t easily do this on a DIY basis as the accuracy needs to be in minutes, not degrees. Most local garages can easily sort this, but dedicated alignment centres have the best kit. Tyre fitters can sometimes deal in volume rather than precision, so in my opinion an alignment centre with four-wheel laser alignment is the best place to go.
As motorhome tyre pressures greatly affect grip and safety they need to be set precisely, and it’s a little more complex than in a regular road car where you simply use the weight indicator on the door jamb sticker for two or four/five occupants.

On a motorhome, the weight can vary far more due to the accessories fitted, the weight of the occupants and the kit you’re loading your motorhome with. Some people try to calculate this weight, but unless you want to weigh every single tin of beans and bottle that passes the habitation door, you’re going to spend a lot of time achieving an accurate figure. There’s a much better way – simply stick the whole vehicle onto a giant weighing scale.
If you visit www.gov.uk/find-weighbridge you’ll find a handy list detailing your nearest public weighbridge (which is a large metal plate designed for weighing trucks). There are also private weighbridges found at scrapyards, truck haulage companies and agricultural merchants that you can often find locally. Visit your nearest weighbridge with all your usual touring kit on board and a full tank of fuel.
The brochure weight is irrelevant when you drive out of the showroom
At the weighbridge, drive on so that just your front wheels are on the metal weighing plate – this will give you the front axle load. Drive on with all four wheels to get your total weight. Total weight minus the front axle weight will give you the rear axle weight.
Now check these weights against the chassis plate on your vehicle, and make sure it’s under both the individual axle weight figures and the Maximum Authorised Mass (MAM) of the vehicle.
Armed with these actual measured motorhome weights, you can now contact your tyre manufacturer – or refer to their axle loading tables which can be found online – and get their recommended tyre pressures.
As many motorhomes travel overweight – some tyre organisations reckon as many as 25% are over their axle weights – some tyre organisations reckon that it’s wise to always inflate the tyres to the maximum pressure indicated on the tyre sidewall.
However, this can result in a harsh ride if the vehicle is underweight and also result in uneven tread wear. So it’s better to weigh the vehicle in touring-ready form and then adjust the tyre pressures to suit that figure.

You can be fined heavily and receive points on your licence if caught driving overladen. It’s the driver’s legal responsibility to know the weight of their vehicle and you may be prevented from onward travelling until the weight is reduced. If you want to lower your vehicle’s weight, my tips on how to reduce the weight of a motorhome could help.
The DVSA actively monitors vehicle weights and don’t even need to stop you – several motorways are fitted with weight-in-motion systems which can weigh each axle individually as you drive over it. They then compare the axle weights against the vehicle’s registered weight and can automatically issue a ticket via numberplate recognition.
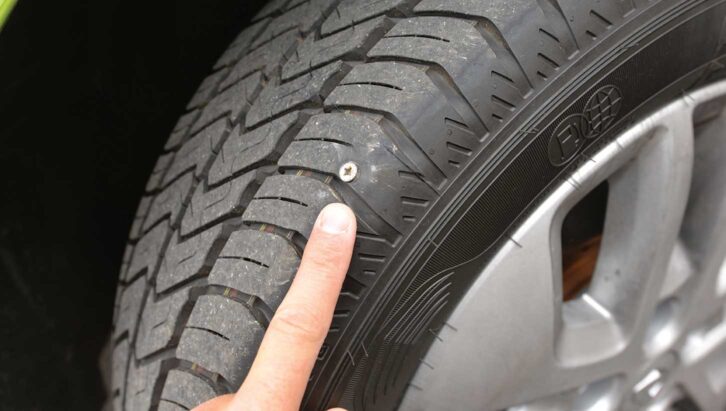
As well as the tyre pressure, it’s worth checking the tyre condition on a regular basis and definitely before any long journeys. Things to look out for are screws and nails in the tread. These are often indicated by a low pressure warning on the tyre pressure monitoring system (TPMS), so don’t ignore these early warnings of issues if your vehicle is fitted with a TPMS.
Cuts, bulges and cracks in the sidewall are always an issue, as are any signs of cords or wires poking through the tread. Tyres that are overheated – often by driving on underinflated tyres – can degrade and in the worst cases the steel reinforcement wires will move around and start to poke through the tread or sidewall.
The verdict on motorhome tyres
Getting into the habit of checking your tyres for condition and pressure is a key part of road safety. Once they get below 3mm tread or more than five years old, it’s wise to replace them.
Don’t skimp on buying tyres and invest in the best premium examples you can afford. They last longer, saving you money in the long run, and more importantly they could save your life in an emergency stop on a wet road.
Why risk the safety of your family just to save a few quid?
See what podcaster Motorhome Matt has had to say about how he’s used the Rule of Three to transform his motorhome travels.
Useful links
Future Publishing Limited, the publisher of Practical Motorhome, provides the information in this article in good faith and makes no representation as to its completeness or accuracy. Individuals carrying out the instructions do so at their own risk and must exercise their independent judgement in determining the appropriateness of the advice to their circumstances. Individuals should take appropriate safety precautions and be aware of the risk of electrocution when dealing with electrical products. To the fullest extent permitted by law, neither Future nor its employees or agents shall have any liability in connection with the use of this information. Double check any warranty is not affected before proceeding.
If you’ve enjoyed reading this article, why not get the latest news, reviews and features delivered direct to your door or inbox every month. Take advantage of our brilliant Practical Motorhome magazine SUBSCRIBERS’ OFFER and SIGN UP TO OUR NEWSLETTER for regular weekly updates on all things motorhome related.
Leave a Reply